Procedural Generation
1. Representing the world
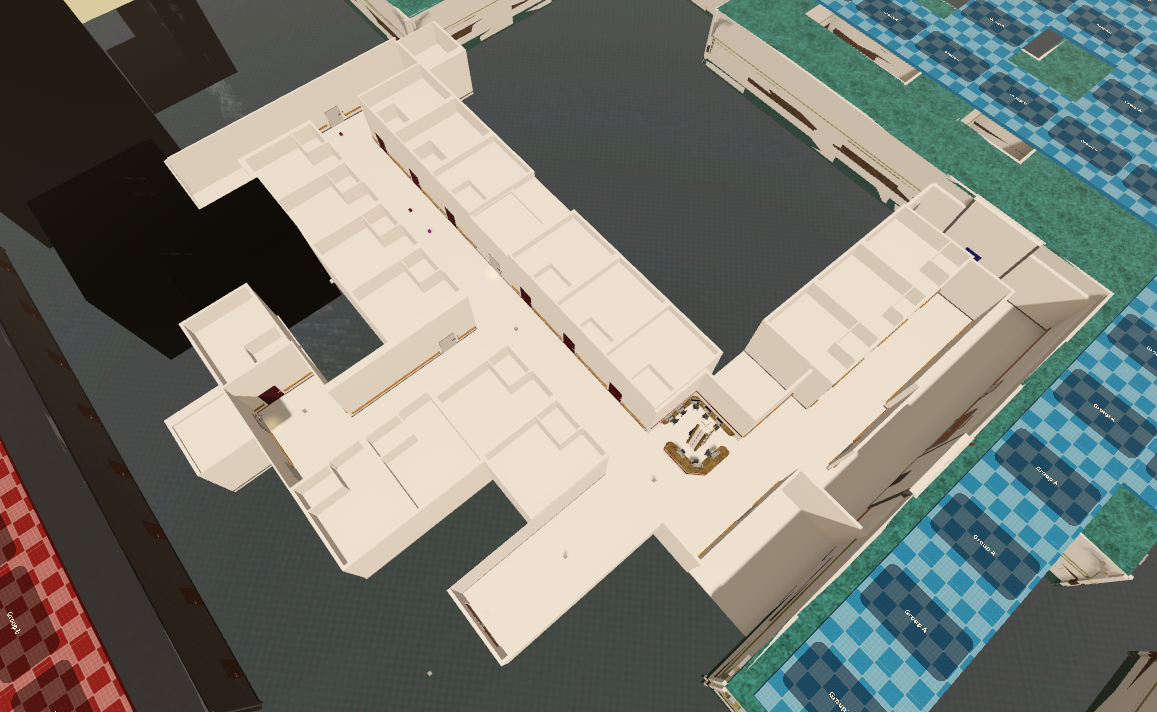
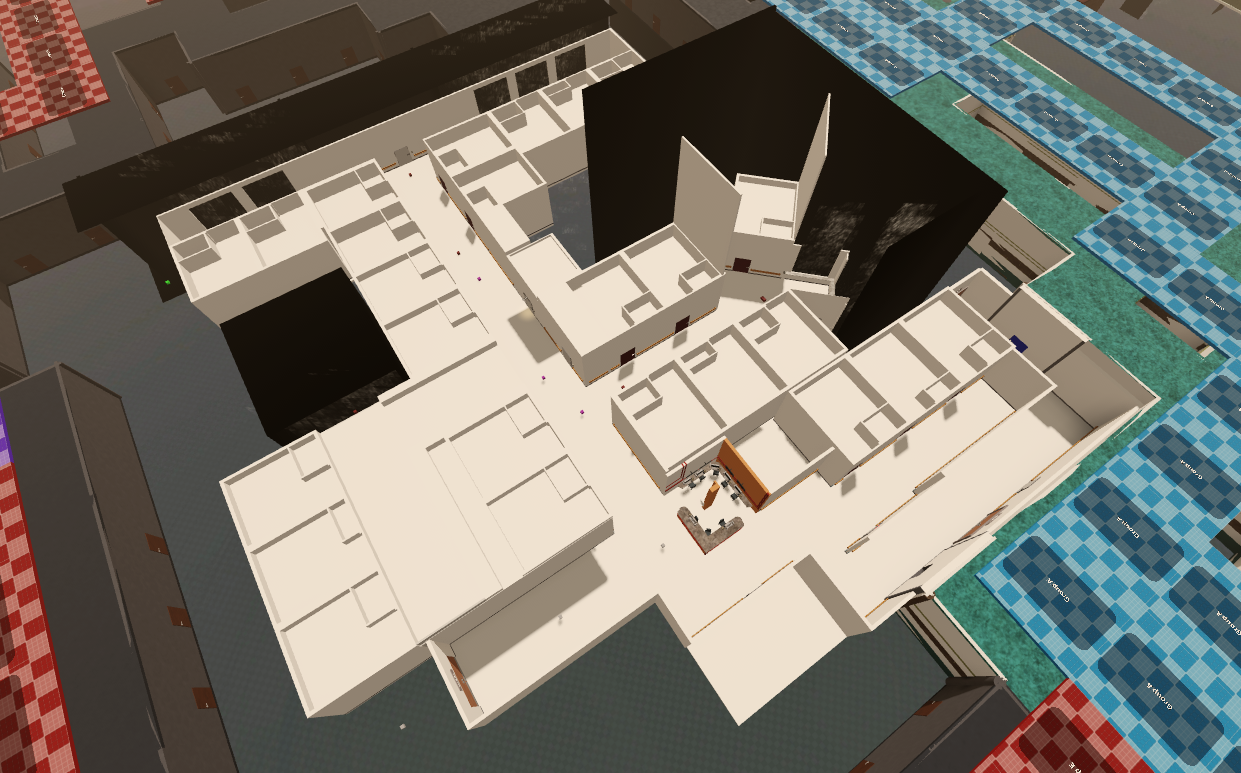
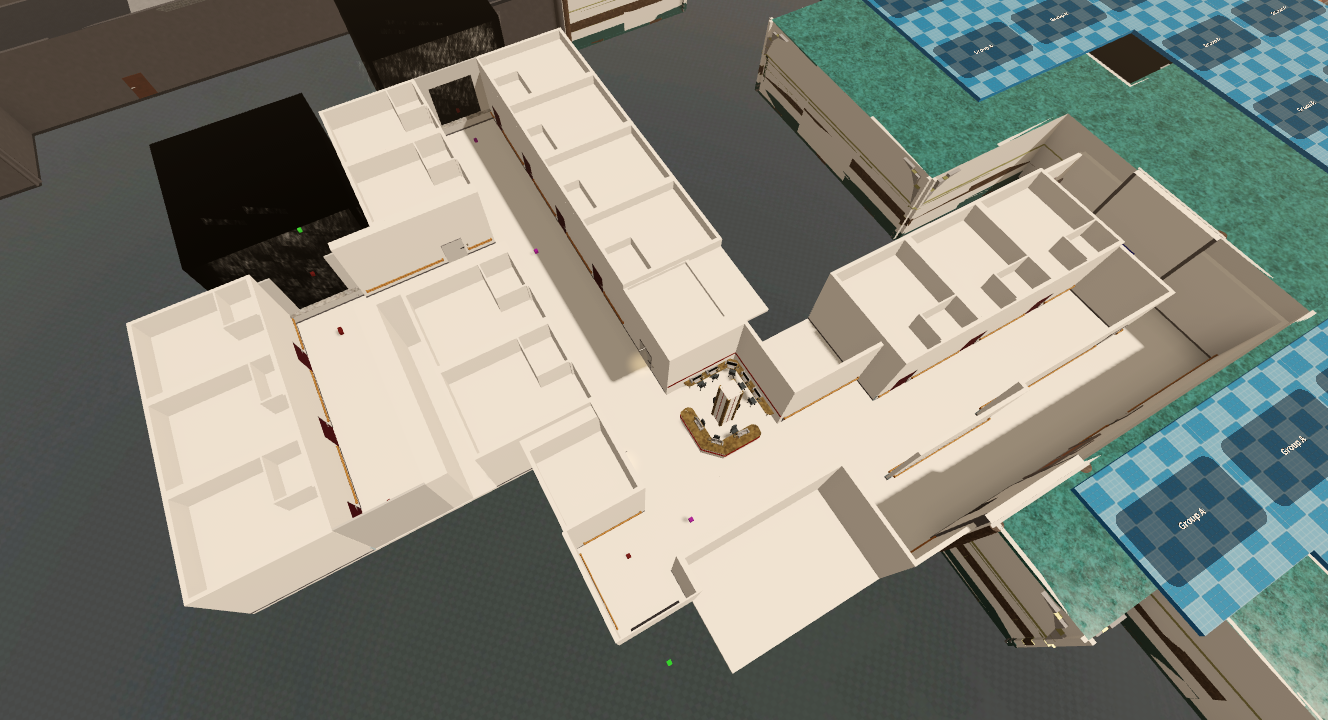
The game world is represented as an n × m array of nodes, where each node encodes the type of space it occupies: such as a room, hallway, doorway, and its associated biome. Each node also maintains references to its neighbors, forming a graph that allows traversal in multiple directions.
This dual structure, both array-based for direct lookup and graph-based for navigation, provides flexibility across the codebase. Many systems, from AI navigation to procedural generation and player interactions, rely on this core representation to query, manipulate, and explore the world efficiently.

2. The hallways must be interesting to walk through
The initial prototype for hallway generation was straightforward: rooms were placed randomly on a grid, and A* pathfinding was used to connect each doorway to every other doorway, prioritizing previously generated hallways.

While this approach achieved basic procedural connectivity, playtesting revealed a critical issue: long, straight hallways quickly became monotonous. The challenge was to create hallways that felt dynamic and natural while avoiding the frustration of a confusing maze.
To improve realism, randomized node weights were introduced into the A* algorithm. Each node was assigned a weight to influence path selection. Initially, this randomized weight caused the resulting hallways felt arbitrary and unnatural. To create more organic layouts, I experimented with perlin noise, inspired by Minecraft’s terrain generation, to bias node weights and produce smooth, flowing hallways.
Through this process, I unknowingly implemented what would later be recognized as Perlin Worm Tunneling, a technique that generates naturally winding paths. This approach allowed hallways to feel deliberate, varied, and engaging, supporting both exploration and gameplay pacing.

3. Biomes
To make the hallways more visually interesting, the procedural generation system includes a biome system designed around fewer, larger regions. This system leverages Perlin noise to produce natural transitions between biomes across the hallways.
Once the initial map and hallways are generated, a new Perlin noise map is created for all nodes. Random nodes and nodes neighboring doorways of important rooms are selected as biome anchors, and neighboring nodes are recursively grouped into the same biome if their noise values fall within a defined range. This depth-first search process continues until the anchor has expanded as far as possible, after which a new anchor is selected from unclaimed nodes. The process repeats until the majority of nodes are assigned a biome, with any remaining nodes defaulting to a baseline biome.

To add further variety, straightaway segments are detected and populated with unique designs that span multiple nodes. These provide visual relief in longer hallways and help hallways feel deliberate rather than purely procedural.


Some biomes include assets that extend beyond the bounds of a single node. For example, in the medfloor biome, ceilings are curved like a train tunnel, requiring larger assets to maintain visual consistency across corners and junctions. During runtime, any portions of these assets that extend outside the node boundaries are removed to prevent clipping.


4. Rooms and Hallways
MODERN MEDICINE uses a hierarchical procedural generation system, meaning that at runtime, objects can spawn other objects, which in turn can spawn additional objects, creating layers of variation and complexity. This hierarchy allows the world to feel dynamic and responsive while maintaining a structured layout.
Rooms are the dynamic, freeform layer of the system. At runtime, a set of core rooms is randomly placed, followed by optional shortcut and loot rooms. Within each room, procedural generation determines which elements appear, and these elements can themselves spawn additional variations, props, obstacles, or interactable objects, creating a multi-layered, hierarchical layout. Room dimensions are also dynamic, adjusting to accommodate whatever spawns inside. For example, the medfloor room challenges players to duck into side rooms to avoid a wandering radiation monster. While the central L-shaped hallway stays consistent, surrounding areas are procedurally generated from multiple variations, ensuring each playthrough feels fresh. This hierarchical system is supported by internal tooling, which is explored further in the Tools section.
Hallways follow a templated node system, forming a more structured layer of the hierarchy. Each hallway node is modular and can be adjusted at runtime based on its neighbors in the graph. Walls can become doorways, segments can be removed or replaced, and biomes can be applied across multiple nodes to maintain cohesion. Hallway nodes can also spawn secondary elements like props or effects, which in turn may spawn smaller details, continuing the hierarchical pattern.
By combining templated hallway nodes with dynamic, hierarchical room generation, the system creates a world that is both navigable and richly varied. Hallways provide clarity and continuity, while rooms introduce surprises and challenges, and the hierarchical spawning ensures the game feels alive and unpredictable.
5. Navigation
Playtesting revealed that players could become frustrated if they felt lost in the hallways. To address this, direction panels were introduced throughout the world. When activated, these panels illuminate an arrow pointing toward the target destination, and a temporary on-floor line appears to guide the player.

Direction panels are integrated with the hierarchical procedural generation system. They can generate on any wall of a hallway node (north, east, south, or west). When a panel is placed, the system calculates its corresponding node, retrieves the node object, and uses the A* pathfinding system (originally developed for world AI navigation) to determine the optimal path from the panel’s location to the destination room’s doorway.
This path data is sent to the client to display the on-floor guidance line. On the server, the arrow’s facing is calculated by comparing the unit vector from the panel to the first node in the path and the unit vector from the panel to the node’s midpoint. This ensures that the arrow points correctly relative to the wall it is mounted on, providing consistent and accurate navigation cues regardless of hallway orientation.
Back